I am by no means a photography expert and wouldn’t even consider myself to be a good photographer. With that being said, taking photos has become an integral part of going to Disney Parks. Some of my favorite memories are walking around empty streets with Melissa, snapping pictures around every corner. While taking photos is different and easier, in some aspects, during the day, I prefer taking photos at night.

A large part of the reason for that is because I just enjoy the park more at night. The illuminated areas hold a little more whimsy once dusk falls and the capturing that in photo is both a challenge and exciting. But, photography at night is much different from the day, which leads me to the topic for today’s post.
Before I get into a few tips on taking photos at night, I should explain that I’m generally taking photos with a Nikon DSLR. While I use my iPhone camera from time to time this post mainly pertains to those using DSLR’s. That’s not to say there is anything wrong with iPhone photos, in fact phones can take comparable pictures to those of high quality cameras. The set-up will be different depending on the camera and I would say nighttime photography is harder with phones than daytime. If you have specific questions on equipment or photography in general, please ask below in the comments (again, not that I’m an expert).
One other warning is that these aren’t really tips to help you take great photos at night. I know a few things but you can find much better information elsewhere. These are simply tips on helping you enjoy the experience more. Sure, some of that enjoyment will come from taking photos that turn out to your liking but some of that experience is separate from just taking photos.

On to the tips!
Use a tripod… or garbage can
Nighttime photography requires longer shutter speeds. To achieve longer shutter speeds, something to rest your camera on is essential. A tripod is the best way to balance your camera. Unfortunately, this usually means carrying a tripod around with your camera gear all day. This isn’t the worst thing but if you don’t want to spend money on a tripod or don’t want to carry it then finding something else to balance a camera on isn’t hard.

The ground and garbage cans are probably the most common ways to take photos at night without a tripod. Yes, this will lead to people looking at you funny but it’s all in the name of art! Or something like that. There are also plenty of mini-tripod options to buy that mostly range between 10 and 20 dollars.
While shooting handheld photos at night is an option, it is hard to balance out a scene without using a slow shutter speed. A flash will illuminate areas but not an entire scene, which is much of what photography and Disney is. A tripod, or something of the like, is essential to nighttime photos at the parks.

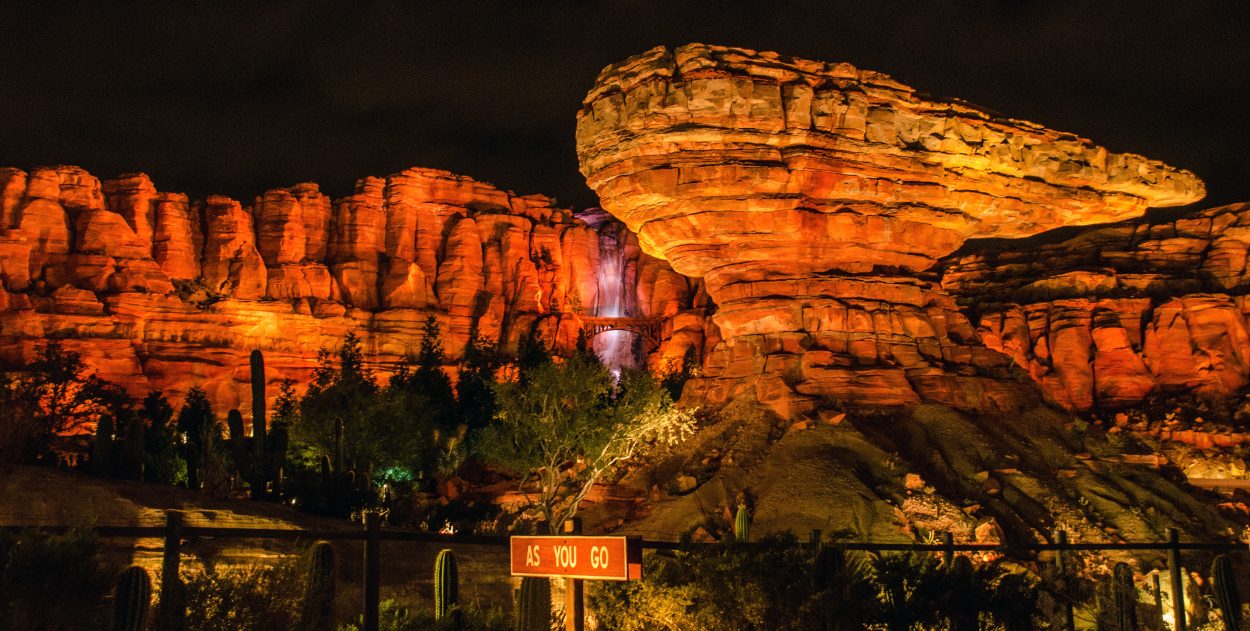
Find a different scene than park icon
The castles, Spaceship Earth and other park icons are some of the most photographed items in the world. That doesn’t make them any less spectacular. By all means, take photos there.
But my favorite experiences photographing at night have been in other places. Part of this is because I feel like I can be more artistic and original. There is something extremely inviting about photographing the icons but it is very hard to find a unique perspective. Other places in the parks haven’t been quite so overdone and are easier to do something more original.

The other enjoyable part of not just photographing the icons is that you’ll likely be by yourself. Once the park closes, most people are near the icons. While you should get there eventually, other areas are still available to walk through. Empty areas with beautiful lights makes for a serene night which leads me to…
Start as far back in the park as possible
My favorite plan of attack when it comes to nighttime photography in Disney Parks is to start in the very back of the park as it closes. This involves picking an area of the park to start in. On my latest trip to Magic Kingdom, Melissa and I rode Pirates right before park closing. Upon exiting I took photos there then headed back into Frontierland for photos of Big Thunder and Splash Mountain. Eventually I ended up in Liberty Square before a subtle push towards Main Street by security.

If you start near the back of the park as park closes, security is likely to give you a little leeway, as people are exiting attractions still. Slowly make your way to the front of the park while taking photos. Security is generally very kind and will allow you to take your time exiting. As long as you’re courteous to them then the favor will probably be returned.
Use different settings
This goes for all times of day when it comes to photography. And this tip is mainly for beginners, like myself. With today’s technology it’s easy to rest on an automatic setting but the experience is far more rewarding (and usually comes up with better photos) if you do things manually. For a long time I was unhappy that my nighttime photos ended up with a red tint. I had always been afraid to mess with my white balance because I had read that I had placed where it needed to be. Finally I decided to change it and my results turned out way better. Like anything, experimenting can be nerve-wracking but it will make you a better photographer in the long run. In that same vein, if you have the time then take multiple photos with different shutter speeds and apertures. This will help you find a style that you like.

Bring someone with you… Or don’t
Last of all, make the experience into exactly that – an experience. This doesn’t just need to be a few minutes of taking photos. Instead it can be a romantic stroll in a beautifully lit park with some photography mixed in. Or if you’re tired of being around people, take an hour and walk around the park alone while snapping photos. This is my favorite time of day to take in all the sights and sounds, it doesn’t need to just be rushing from area to area taking photos. As with all things in Disney Parks, take the time and enjoy yourself!

If you have any questions or comments about taking photos at Disney Parks, I’d love to answer them below in the comments. Thank you for reading Wandering in Disney, if you enjoy our posts please subscribe to the blog and follow our social media pages. You can find both of those on the right side of this page.
– Andrew
Categories: Uncategorized, Vacation Tips
The photos you have taken and shown here are phenomenal, you have no reason to say you are not an expert, the photos say otherwise! What Nikon DSLR do you use in particular? I switched to a Canon and know it shouldn’t matter but these photos make me want to switch back!
Thank you, that’s very kind. I use a Nikon D7000, it’s an older model and I will be looking to update in the next year to a newer Nikon body. That said, this model has been extremely durable and functional for many years for me (and I bought it used along with that).
While I will be sticking to Nikons in the future, mostly out of respect for how well my current gear has performed, I don’t think there is a stated difference in picture quality dependent on what kind of camera you use. My honest opinion is that lenses (along with using other gear like tripods, etc.) will play a bigger role in quality of photos than your camera body or brand name. While it’s not quite as simple as “the nicer lens you get the better your photos will be” it does play a pivotal role.
Thanks for making me feel much better about that. I agree with you, I’m sure unsure on the “color science”. That and I do a lot of video is why I made the jump from entry level Nikon to Canon. But I’ll stick with it a bit thanks to your advice. Another question i have for you is focal length, are these shots fairly wide? I’m pretty amateur so thanks for the insight.
A few of the shots in this post use a fisheye lens that I have been using less and less. The rest are not particularly wide in this post but I do love my wide angle lens (that I purchased after I published this post). Most of what I have in this post (https://wanderingindisney.com/2019/01/04/my-top-ten-disney-parks-photos-of-2018/) use a wider Tamron lens that I love and works well at night with low aperture. Almost any photo on this blog you can click on, it will direct you to my flickr page and that will have the settings used to take the photo with.